Edge Banding for Beginners: Make Plywood Furniture Look Cleaner
Plywood is cheap, strong, and perfectly flat. But man, those exposed layers are hideous. Unless you're going for that super-industrial, unfinished vibe, you need to hide them. That's exactly why you need to learn edge banding. If you're looking into edge banding for beginners, don't panic. It's basically just a thin strip of real wood veneer with heat-activated glue on the back. Iron it on, and suddenly your cheap plywood looks like a solid slab of expensive hardwood. It’s the easiest trick in the book for cleaner furniture edges.
The Dirt-Cheap Tool List
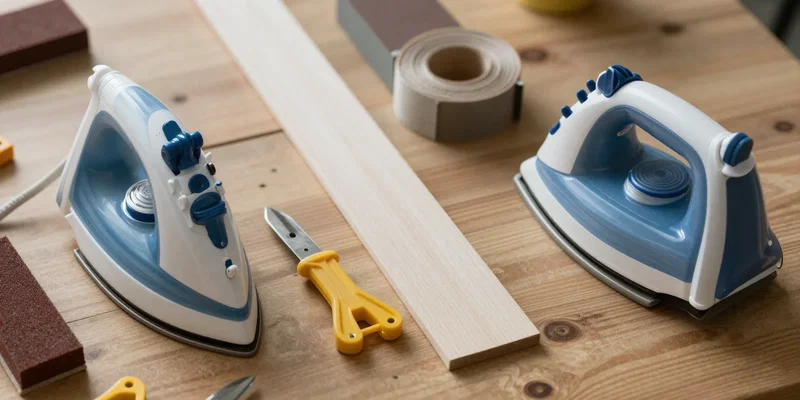
Forget buying heavy machinery. You don't need it for DIY woodworking. You need three things. A roll of pre-glued edge banding. A plastic edge trimmer. And an ordinary clothes iron. Seriously. Go raid your laundry room. Just make sure you drain all the water out first. Steam absolutely ruins bare wood. Grab a block of fine-grit sandpaper while you're at it. That's your entire setup.
Heat It and Stick It
Cut a strip of banding about an inch longer than your plywood edge. Center it so there's a little overhang on both sides. Now, turn your iron up to the "cotton" setting. Slowly glide it over the wood tape. Don't stay in one spot too long or you'll scorch the veneer. You'll literally feel the glue melting and gripping the board. Once it's hot, put the iron down. Grab a smooth block of scrap wood. Press it hard along the freshly glued edge and rub back and forth. Friction is your friend here. It forces the hot glue into the wood pores.
Shaving the Overhang
Your banding is stuck fast, but it looks terrible. There's excess hanging off both sides. Take a breath. This is the fun part. Grab your edge trimmer. Squeeze it tight against the board and slide it forward. The internal razor blades will shave off the excess veneer in one satisfying, continuous ribbon. It feels amazing. If you don't have a trimmer, a very sharp utility knife works. Just keep the blade perfectly flush with the plywood surface so you don't accidentally gouge your project.
The Secret to a Flawless Plywood Furniture Finish
Trimming gets you 90% of the way there. But the edge is probably still a bit sharp. Maybe there's a microscopic lip of hardened glue. Take a 220-grit sanding block and lightly hit the corners. Two or three swipes at a 45-degree angle. That's it. You aren't trying to reshape the board. You're just softening the harsh edge. Wipe off the dust. Run your thumb across the seam. If you did it right, you won't even feel where the plywood ends and the solid edge begins.